letronikOVC - instalacja serwera bazy danych - Widows 10 / Lubuntu 20.04
- letronikOVC - instalacja serwera bazy danych - Widows 10 / Lubuntu 20.04
- Instalacja serwera mariadb na Windows 10.
- Instalacja serwera mariadb na Lubuntu 20.04
- Tworzenie bazy licznika
-
- Logowanie do mySQL Windows
- Logowanie do mySQL Ubuntu
- Po zalogowaniu klienta do serwera tworzenie bazy przebiega nie zależnie od systemu operacyjnego.
- Tworzenie użytkownika SQL np: testuser, hasło wwwLetronikPl
- Nadanie użytkownikowi testuser z dowolnego hosta praw administratora do bazy testdb
- Zatwierdzenie praw:
- Możemy też stworzyć konto dla gościa, tylko z możliwością podglądu:
- Sprawdzenie:
-
- Odpowiednia konfiguracja licznika:
- Włączanie w systemie Windows usługi ping (echo).
- Windows - ustalanie IP komputera/serwera.
Instalacja serwera mariadb na Windows 10.
Uwaga!
- Nasz licznik wymaga, aby serwer mySQL udostępniał usługę ping (echo). System Windows domyślnie jej nie udostępnia. Opis, jak ją uruchomić znajduje się tutaj.
- Podczas instalacji i pracy z serwerem musimy znać adres IP komputera, na którym uruchomiony jest serwer. Jak to sprawdzić?
Opis instalacji znajduje się pod adresem.
Installing MariaDB MSI Packages on Windows - MariaDB Knowledge Base
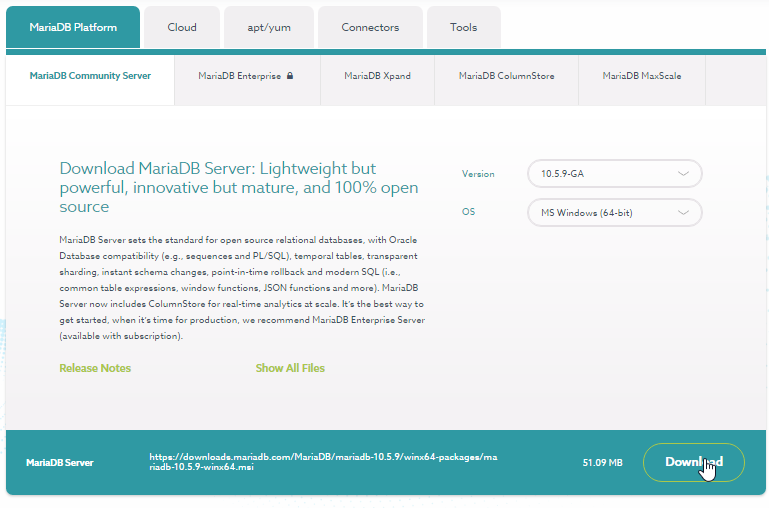
Pobieranie.
Instalka jest na stronie:
Download MariaDB Products & Tools | MariaDB
Wybieramy OS i klikamy [Download]
Instalacja.
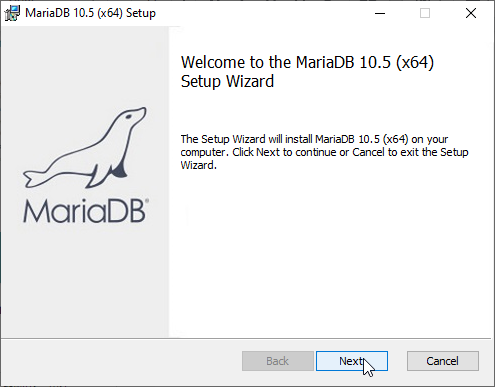
Otwieramy pobrany plik:

Czekamy aż pojawi się okno:
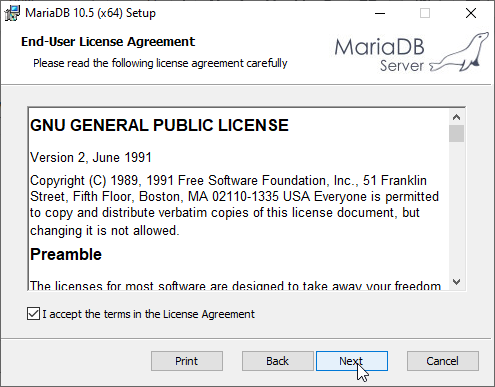
Zatwierdzamy licencję:
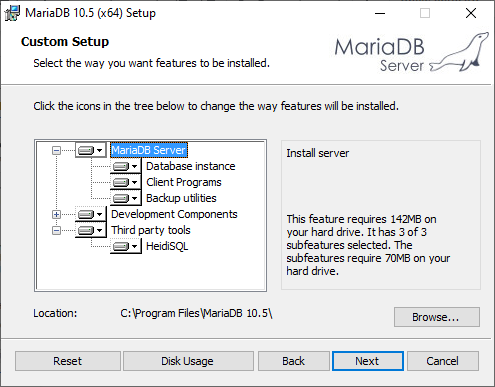
Następne okno przechodzimy bez zmian:
W instalacjach tylko dla sieci lokalnej możemy użyć hasła
wwwLetronikPl5%
Jeżeli baza ma być dostępna z internetu, musimy stworzyć silne hasło i je zabezpieczyć przed utratą (np: menedżer haseł).
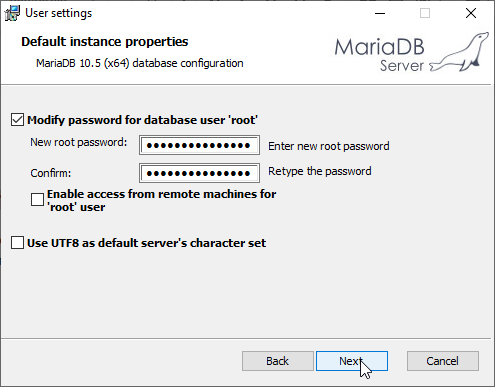
Następną kartę możemy przejść bez zmian:
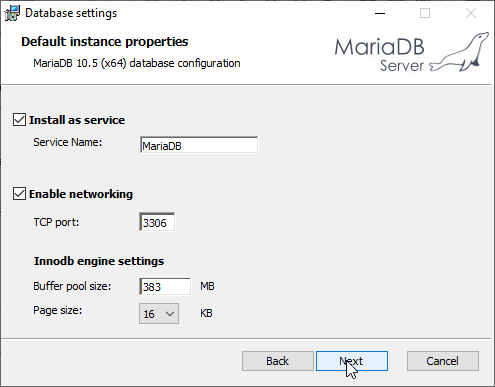
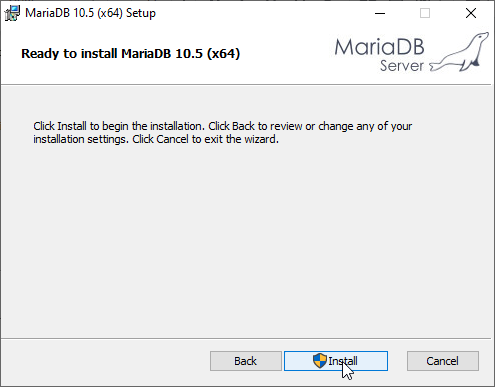
Zezwalamy na zmiany w urządzeniu i ostatecznie:
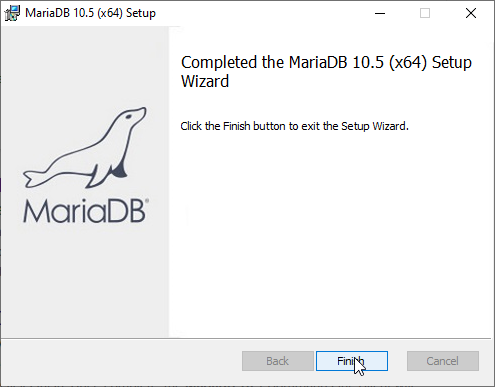
Konfiguracja
Domyślna konfiguracja jest wystarczająca, nie trzeba wprowadzać żadnych zmian. Poniżej, tylko w celach informacyjnych, przedstawiam położenie plików konfiguracyjnych.Default Option File Locations on Windows
On Windows, the option file can be called either my.ini or my.cnf. MariaDB looks for the MariaDB option file in the following locations in the following order:
|
Location |
Scope |
|
System Windows Directory\my.ini |
Global |
|
System Windows Directory\my.cnf |
Global |
|
Windows Directory\my.ini |
Global |
|
Windows Directory\my.cnf |
Global |
|
C:\my.ini |
Global |
|
C:\my.cnf |
Global |
|
INSTALLDIR\my.ini |
Server |
|
INSTALLDIR\my.cnf |
Server |
|
INSTALLDIR\data\my.ini |
Server |
|
INSTALLDIR\data\my.cnf |
Server |
|
%MYSQL_HOME%\my.ini |
Server |
|
%MYSQL_HOME%\my.cnf |
Server |
|
defaults-extra-file |
File specified with --defaults-extra-file, if any |
-
The System Windows Directory is the directory returned by the GetSystemWindowsDirectory function. The value is usually C:\Windows. To find its specific value on your system, open cmd.exe and execute:
-
echo %WINDIR%
-
The Windows Directory is the directory returned by the GetWindowsDirectory function. The value may be a private Windows Directory for the application, or it may be the same as the System Windows Directory returned by the GetSystemWindowsDirectory function.
-
INSTALLDIR is the parent directory of the directory where mysqld.exe is located. For example, if mysqld.exe is in C:\Program Files\MariaDB 10.3\bin, then INSTALLDIR would be C:\Program Files\MariaDB 10.3.
-
MYSQL_HOME is the environment variable containing the path to the directory holding the server-specific my.cnf file.
Linia w pliku konfiguracyjnym, zezwalająca na zdalnie
połączenia -
bind-address = 0.0.0.0.
Domyślna konfiguracja zezwala na zdalne połączenia, liczniki
mogą się łączyć z bazą, nic nie trzeba zmieniać.
Instalacja serwera mariadb na Lubuntu 20.04
Opis instalacji możemy znaleźć w internecie.
Np:
https://www.digitalocean.com/community/tutorials/how-to-install-mariadb-on-ubuntu-20-04
Podczas pracy z bazą danych potrzebny nam będzie adres IP komputera, na którym instalujemy bazę. Przy łączeniu z bazą będzie to adres Host.
Jeżeli go nie znamy, poda nam go polecenie
ip addr show⏎
⏎ - oznacza naciśnij klawisz enter tego znaku nie kopiujemy.
Otrzymamy coś takiego:
$ ip addr show
1: lo: <LOOPBACK,UP,LOWER_UP> mtu 65536 qdisc noqueue state UNKNOWN group default qlen 1000
link/loopback 00:00:00:00:00:00 brd 00:00:00:00:00:00
inet 127.0.0.1/8 scope host lo
valid_lft forever preferred_lft forever
inet6 ::1/128 scope host
valid_lft forever preferred_lft forever
2: enp8s0: <NO-CARRIER,BROADCAST,MULTICAST,UP> mtu 1500 qdisc fq_codel state DOWN group default qlen 1000
link/ether 00:1e:68:5e:bc:b9 brd ff:ff:ff:ff:ff:ff
3: wlp2s0: <BROADCAST,MULTICAST,UP,LOWER_UP> mtu 1500 qdisc mq state UP group default qlen 1000
link/ether 00:1f:3c:34:cf:1f brd ff:ff:ff:ff:ff:ff
inet 192.168.1.62/24 brd 192.168.1.255 scope global dynamic noprefixroute wlp2s0
valid_lft 76sec preferred_lft 76sec
inet6 fe80::96e4:4f57:2a23:d407/64 scope link noprefixroute
valid_lft forever preferred_lft forever
Adres IP jest po słowie inet, przy czym nie bierzemy pod uwagę: inet 127.0.0.1
W skrócie:
sudo apt update
sudo apt install mariadb-server
sudo mysql_secure_installation
W innych systemach podczas instalacji instalator prosi o hasło dla root, które trzeba zapamiętać na przysłość. W Ubuntu to nie występuje.
-
sudo apt update ⏎
-
sudo apt install mariadb-server ⏎
-
sprawdzam:
sudo mysql ⏎
Welcome to the MariaDB monitor. Commands end with ; or \g.
Your MariaDB connection id is 59
Server version: 10.3.25-MariaDB-0ubuntu0.20.04.1 Ubuntu 20.04
Copyright (c) 2000, 2018, Oracle, MariaDB Corporation Ab and others.
Type 'help;' or '\h' for help. Type '\c' to clear the current input statement.
MariaDB [(none)]>
żeby wyjść wpisujemy exit; ⏎
MariaDB [(none)]> exit;⏎
Bye
-
Zabezpieczenie mySQL
sudo mysql_secure_installation ⏎
Enter current password for root (enter for none): ⏎
Set root password? [Y/n] n
Remove anonymous users? [Y/n] y
Disallow root login remotely? [Y/n] y
Remove test database and access to it? [Y/n] y
Reload privilege tables now? [Y/n] y
-
Logowanie z innego serwera. Musimy pozwolić zalogować się licznikowi do bazy.
Edycja pliku
/etc/mysql/mariadb.conf.d/50-server.cnf
np:
sudo nano /etc/mysql/mariadb.conf.d/50-server.cnf
Odszukujemy następującą linię (np: przy pomocy skrótu ^W):
bind-address = 127.0.0.1
Linię tę trzeba zakomentować #
#bind-address = 127.0.0.1
Zapisujemy plik:
ctrl O
Wychodzimy z edytora:
ctrl X
sudo service mariadb restart ⏎
Tworzenie bazy licznika
Logowanie do mySQL Windows
Wpisujemy w wyszukiwarkę "mariadb"
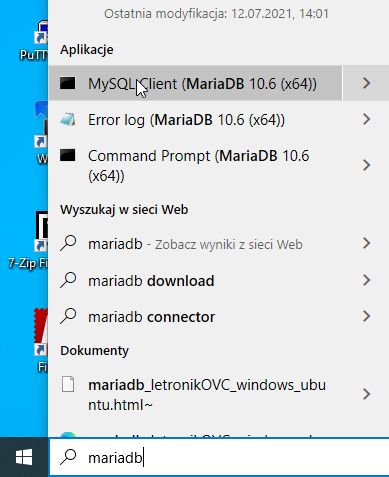
i klikamy "mySQL Client".
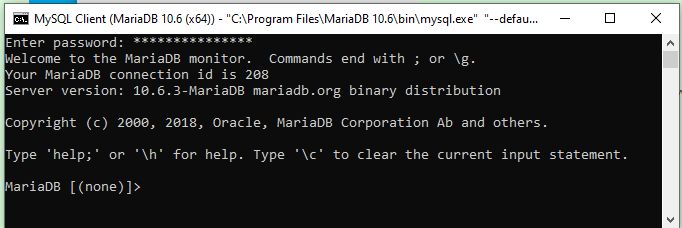
Otworzy się czarne okno w którym trzeba wpisać hasło root
mySQL, w naszym przykładzie "wwwLetronikPl5%".

Po wpisaniu hasła i zatwierdzeniu [enter] otworzy się klient
gotowy do przyjmowania poleceń.
Logowanie do mySQL Ubuntu
sudo mysql
Po zalogowaniu klienta do serwera tworzenie bazy przebiega nie zależnie od systemu operacyjnego.
Klient bazy mysql wymaga, aby każde polecenie kończyło się średnikiem. Dlatego przy kopiowaniu komend nie pomijaj średnika
MariaDB [(none)]> create database testdb character set utf8mb4 collate utf8mb4_unicode_ci;⏎
Query OK, 1 row affected (0.001 sec)
Tworzenie użytkownika SQL np: testuser, hasło wwwLetronikPl
MariaDB [(none)]> CREATE USER 'testuser'@'%' IDENTIFIED BY 'wwwLetronikPl';⏎
Query OK, 0 rows affected (0.001 sec)
Nadanie użytkownikowi testuser z dowolnego hosta praw administratora do bazy testdb
MariaDB [(none)]> grant all on testdb.* to 'testuser'@'%';⏎
Query OK, 0 rows affected (0.001 sec)
Zatwierdzenie praw:
MariaDB [(none)]> flush privileges;⏎
Query OK, 0 rows affected (0.001 sec)
Możemy też stworzyć konto dla gościa, tylko z możliwością podglądu:
MariaDB [(none)]> CREATE USER 'guest'@'%' IDENTIFIED BY 'letronik';⏎
Query OK, 0 rows affected (0.000 sec)
MariaDB [(none)]> grant select on testdb.* to 'guest'@'%';⏎
Query OK, 0 rows affected (0.001 sec)
MariaDB [(none)]> flush privileges;⏎
Query OK, 0 rows affected (0.001 sec)
MariaDB [(none)]> exit;⏎
Bye
Sprawdzenie:
Uruchomienie klienta mySQ dla zwykłego użytkownika w Windows.
W wyszukiwarkę wpisujemy "mariadb".
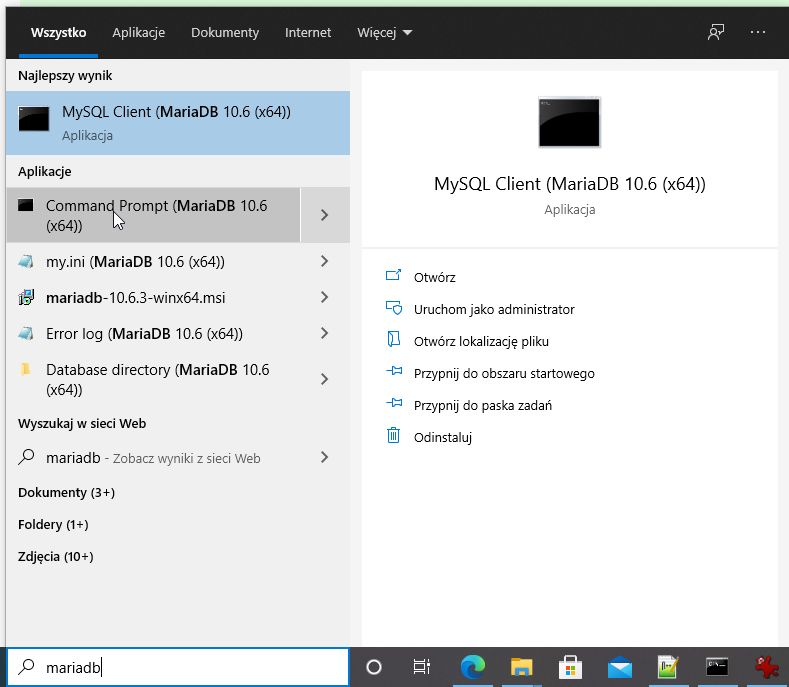
i klikamy "Command Prompt..."
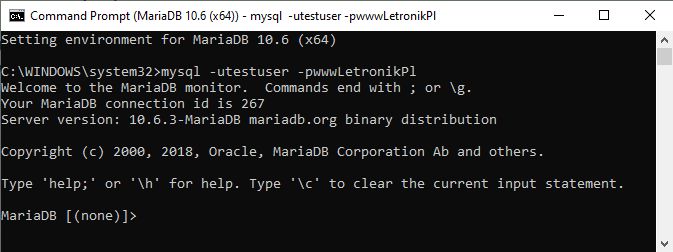
W okno które się pokaże wpisujemy:
mysql -uNazwaUżykownika -pHasło i [enter]
Uruchomienie klienta mySQ dla zwykłego użytkownika w
Ubuntu.
$ mysql
-u testuser -p
Enter password:
Welcome
to the MariaDB monitor. Commands end with ; or \g.
Your
MariaDB connection id is 63
Server
version: 10.3.25-MariaDB-0ubuntu0.20.04.1 Ubuntu 20.04
Copyright
(c) 2000, 2018, Oracle, MariaDB Corporation Ab and
others.
Type
'help;' or '\h' for help. Type '\c' to clear the current
input statement.
MariaDB
[(none)]>
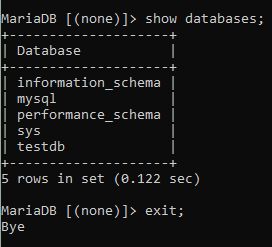
Do uruchomionego klienta wpisujemy polecenia zakończone
średnikiem
show databases;
Poniżej zapis sesji:
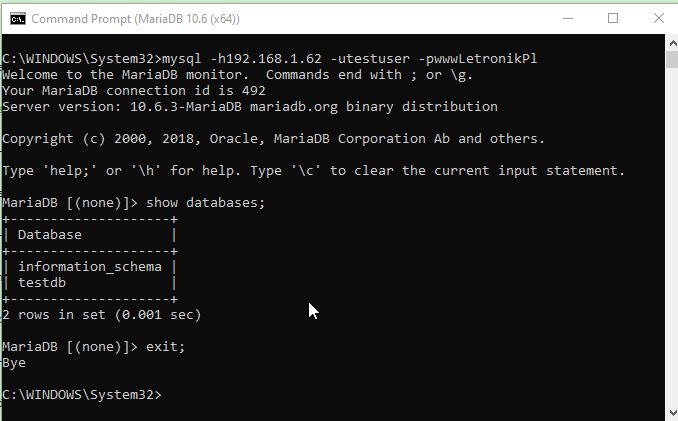
Logowanie i testowanie z innego komputera w tej samej sieci:
Uwaga: ten inny komputer musi mieć zainstalowanego klienta
mySQL.
Tu przykład dla Windows.
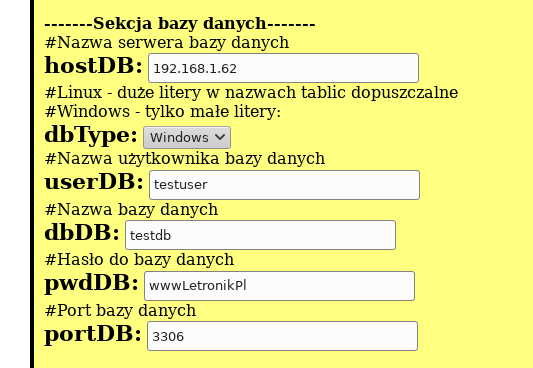
Odpowiednia konfiguracja licznika:
Sprawdzenie tablic licznika:
Po kilku minutach w bazie licznik założy tablice. Żeby je
sprawdzić, należy klientem zalogować się do bazy powyższe na
dane, z jakich korzysta licznik.
Po zalogowaniu należy wykonać polecenia:
- Wybrać bazę:
use testdb; - Sprawdzić tablice:
show tables;
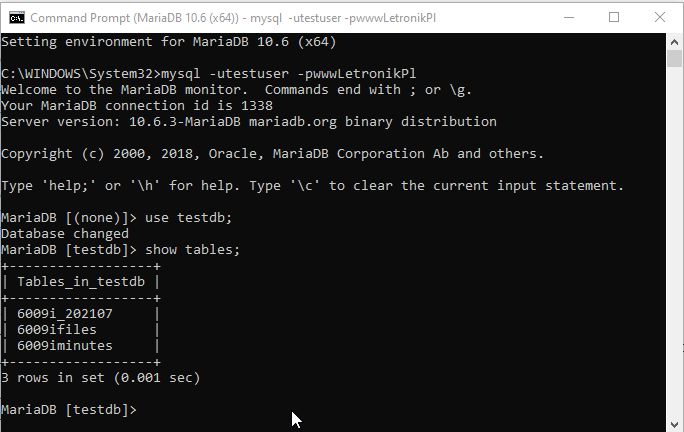
Dla każdego licznika powinna być tablica ...files, ...minutes, ..._YYYYMM.
Niektóre konfiguracje licznika nie generują tablicy ...files.
Jeżeli brakuje tablicy ..._YYYYMM, to prawdopodobne na serwerze nie działa usługa ping.
Włączanie w systemie Windows usługi ping (echo).
- Panel sterowania\System i zabezpieczenia\Zapora Windows Defender.
- Ustawienia zaawansowane
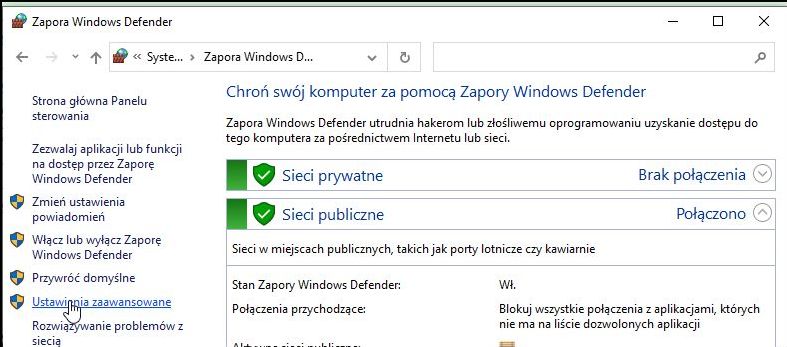
- Reguły przychodzące.
- Włącz reguły jak w ramce.

Windows - ustalanie IP komputera/serwera.
Aby sprawdzić adres IP komputera z Windows w sieci
lokalnej należy w wierszu poleceń wpisać komendę ipconfig.
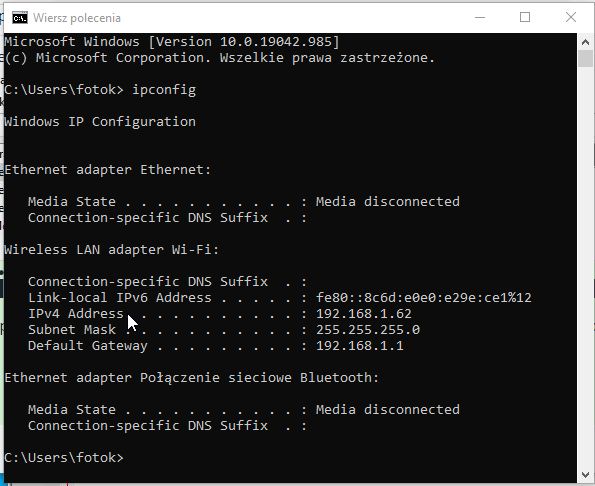
W wierszu zaczynającym się od IPv4 Address
znajduje się wartość adresu IP.
2021.10.04